Friday 29 July 2011

:: Order in the Kitchen: Parchment Wrappers ::


DIY Country Style Parchment Paper Wrappers
:: Megann's Kitchen :: 

:: DIY parchment paper wrappers by megann's kitchen ::


There is something about having a stash of your own home-made wrappers in the pantry that adds to the country style of your baking. Our grandmothers would have used parchment liners like these if they had no "bought" ones in the pantry, however they have now become a trend. These delightful DIY parchment paper wrappers have become so popular the world over, that they now can be bought pre-made & packaged. You will see them everywhere - from patisseries & cafes to a home kitchen like mine. I adore these wrappers as they add a visual homely, warm touch to each muffin.
They are oh-so easy to make, so next time you are feeling crafty, grab a roll of baking paper, ruler, stanley knife, cups & get making!

Equipment:
1 x 30 cm (12 inches) wide roll baking/parchment paper
1 x metal ruler
1 x stanley knife, craft scalpel or scissors
2 x cups (I use my toddler's plastic Tupperware bell tumblers)
1 x muffin tin


:: 15cm squares of parchment paper ::
Step #1
:: The first thing to do is cut your paper into 15cm (6 inch) squares. Once you have your desired number of papers, place carefully in a pile.
 

:: pull down, pleating at the sides ::
Step #2
:: Turn your cup upside down & place a sheet of parchment paper over the top. Making sure the sheet is centred, pull down firmly, pleating at the sides & smooth.


:: re-enforce for sharp pleats ::
:: slowly separate your cups ::
 Step #3
:: Re-enforce the pleats by placing a second cup over the top. Carefully separate the cups to reveal your wrapper.


:: double check your sizing & if correct, make up reserves ::
Step #4
:: Double check the first wrapper that you make by placing into your muffin tin. Does it fit in beautifully? Repeat Step #2 and Step #3 with remaining sheets!


:: making enough for my next batch of muffins ::

Kitchen Notes:
:: The cups used can be any cup that measures 5cm or 2" at the base & fits into your desired muffin tin.
:: Whist watching TV at night, I like to make up a large quantity for my next couple of batches of muffins so they are pre-prepared & ready to go.
:: The parchment papers can be bought pre-cut from industrial stores or online, however I have only found them in packs of 1000.
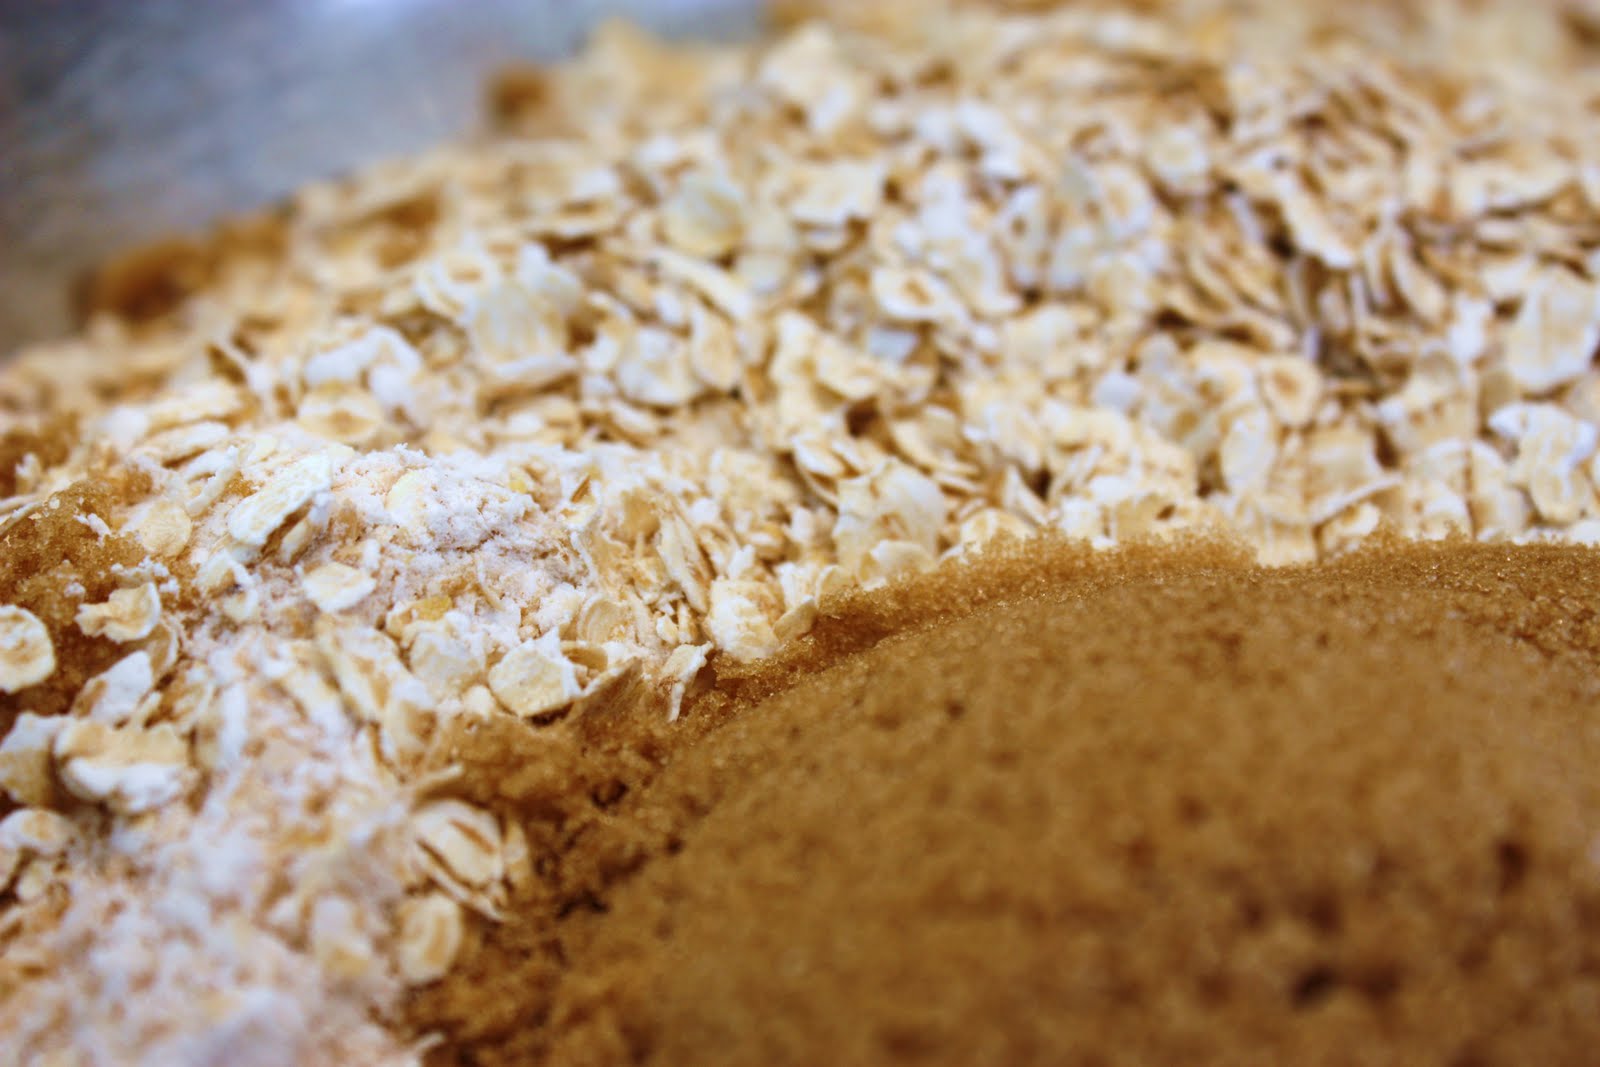
:: This could be a great project for kids to help with. As they tuck into their next batch of Blueberry Muffins or Apple & Pear Crumble Muffins, they will know that they helped contribute!


:: blueberry muffins ::
:: blueberry muffins :: 


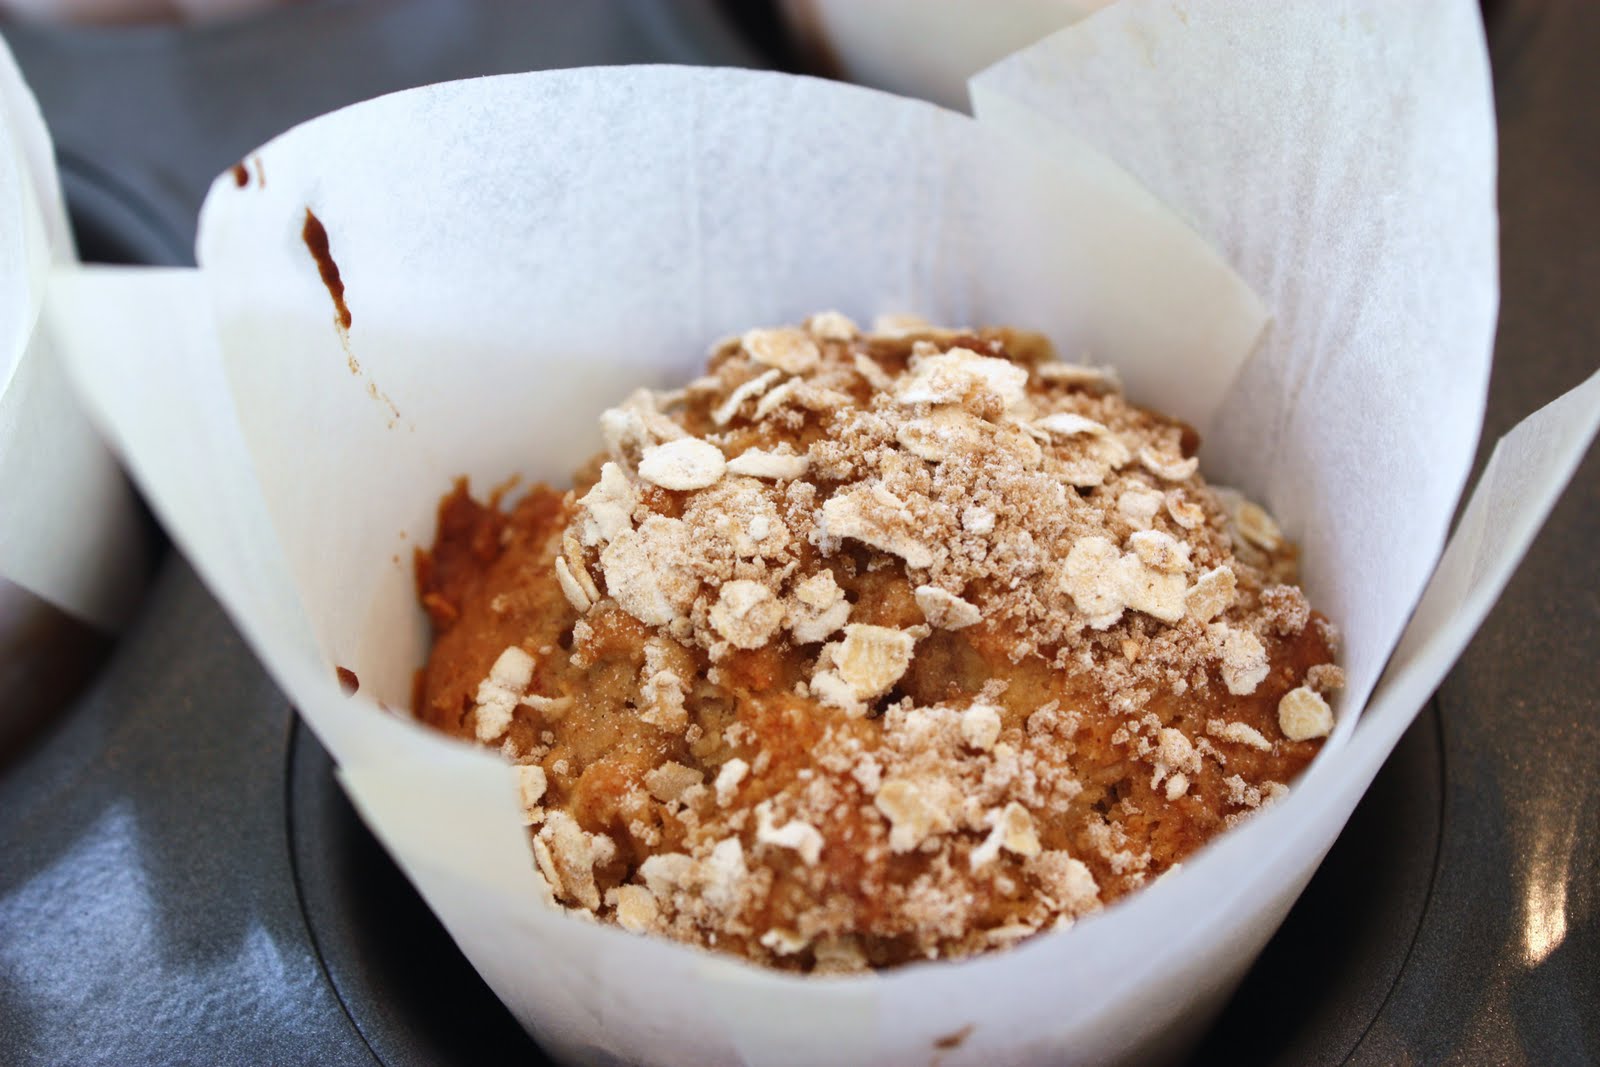
:: apple & pear crumble muffins ::


Source: Follow on to Martha Stewart's Website for some good ideas.
Pre-Made Wrappers: Donna Hay Packaged Parchment Papers, follow on to the general store to purchase. 
Tupperware Bell Tumblers: Sourced through my local Tupperware representative.


Wednesday 20 July 2011

:: Crumbly Tops ::

Apple & Pear Crumble Muffins
:: Megann’s Kitchen ::


:: beautiful apple & pear crumble muffins ::


I have to say, these muffins are fantastic! Inspired by Bill Granger, they are quite delicious & I often make them for a healthier morning tea option. They don’t really taste like you are eating something that has wholemeal flour or oats in it, they are just plain yummy! Also great for breakfast on the go, when all of society is looking for a fast & healthier option these days, why not make these muffins instead?

Apple & Pear Muffin Mixture
1 cup plain flour
½ cup wholemeal plain flour
3 tsp baking powder
2 tsp ground cinnamon
1 cup of oats
½ cup brown sugar
2 large eggs
1 cup plain yoghurt
½ cup grapeseed oil (or other light flavoured oil)
1 pear, peeled & diced
2 granny smith apples, grated

Crumble Topping
¼ cup brown sugar
¼ cup oats
2 tsp flour
½ tsp cinnamon


:: the healthy dry mixture ::

:: Preheat oven to 180°C (350°F). Prepare your muffin tins with muffin wrappers or by greasing them. Sift both flours, cinnamon and baking powder into a large bowl and add the oats & brown sugar. Mix to combine. In another bowl, add the yoghurt, eggs, & oil & whisk until smooth. Add to the flour mixture & stir until it is just combined. Fold through the pears & apple until just combined. Use two tablespoons (one to pick up your mixture and one to neatly push it off your spoon) to place the mixture into your prepared non-stick muffin trays. I like to line mine with crisp, white liners. Mix the ingredients for the crumble topping together in a small bowl & sprinkle over the top of your muffin mixture.

Bake for 14 minutes or until cake tested with a skewer and golden on top.

:: yoghurt mixture ::

Serve
:: The best way to serve your muffins is fresh out of the oven, after about 10-15 minutes of cooling, with a generous slathering of real butter that melts as you bite into it.

Kitchen Notes
:: Always remember for a soft, moist muffin that rises to their full potential, stir the ingredients until it is just combined. Overworking your mixture activates the gluten, making it tough and dry.

Muffin Options
:: I have sometimes substituted the natural yoghurt with sour cream or vanilla yoghurt, or half-half when I haven’t had the complete ingredients in my fridge.
:: You can also put ¼ cup chopped pecan nuts through the apple crumble mixture if you like a nutty flavour, yum!
:: For x-large muffins, bake 180°C (350°F) for 20-25 minutes.


:: stir until just combined ::


:: golden brown & out of the oven ::

:: as always, I love mine with lots of salted butter ::

Healthy Oats
:: The health benefits of oats are undeniable. It is a significant source of fibre in your daily diet & can help with blood pressure, weight control, blood sugar levels and over a long time it has also been proven to reduce the risk of cancer. For further reading follow on to eatmoreoats.com


Source: Bill Granger’s Holiday - You can purchase this book by following the links provided
Donna Hay General Store: DonnaHay Parchment Cupcake Papers- Small
You can purchase these by following the links provided
Order in the Kitchen: Parchment Paper Wrappers


Tuesday 12 July 2011

:: Owl Themed Party ::

A Hoot of a Time
:: Megann’s Kitchen ::

:: owl themed 2nd birthday party ::

What can I say, I just love birthdays. The thought that someone has set aside a special day of celebration just for you is just that, special, and shouldn’t be taken lightly. I am not one to pass off birthdays as just another day, you deserve recognition of the anniversary of the day you were born. I also have had brief inner yearnings for being a small event stylist & when I was given my very own little person to “party plan” for, well, I went a little OTT, or OCD as my sister neatly put it in a text message! Being able to think kids birthdays is just incredible & brings a smile to my face every time.


You see, I have incredible memories of tremendous cakes that mum used to make as a child. She would dutifully slave over her creation for hours on end & the result would be... “WOW!”. I don’t know what my memories would be like if it wasn’t for the origional Women’s Weekly Children’s Birthday Cake Book, but it was the source of so many of my birthday cakes. Now, I have this book in my bookshelf and mum has passed the birthday cake baking baton to me, so here I go.


:: welcome owl sign with matching mini bunting ::
:: owl invitiations, with an invisible magnet ::

:: our beloved "hoot" owl ::

This year it had to be an Owl theme. My little munchkin loves owls. He watches “Giggle & Hoot” as part of his bedtime routine & loves all owls as a result. I knew straight away it had to be an Owl theme as soon as I saw some gorgeous invites by Hipp that matched the vision that I had in my head. I themed everything to the invite & I can’t tell you how much fun I had!


:: the "before" of the owl cake ::
:: the "after" of the owl cake! ::

Why I decided to try fondant icing for the first time ever on an Owl cake of this size (2 x 22cm cake tins), the word insane comes to mind, but the end result looked surprisingly good! I had many conversations with my local cake shop & the chef at the Newcastle Essential Ingredient (very helpful, thank you!) to gain some inside knowledge + tips & tricks of the trade. I was given the “easy option” & the “harder but will look better if you manage to do it” option... can you guess which one I went for at 2am? Harder. Yes, I am crazy. An artistic background helps, but tired, blurry eyes don’t!


:: owl "ginger hoot" cookies::
:: platter of "ginger hoot" cookies with owl tags ::

I also decorated my first batch of Gingerbread Cookies with Royal Icing & they turned out not too shabby. I couldn’t believe how they came together. Even with the leftover mixture I made a few tiny stars which I used as well. I found a great handmade copper Owl Cookie Cutter online from the US, cheaper than you would ever find it here. Copper Gifts have a vast range of cookie cutters & decorating supplies, perfect for your next function or themed event.


:: vanilla cupcakes topped with chocolate buttercream & owl fondant cupcake toppers ::

I sourced a few things, one was the cupcake toppers I found from an eBay store named red_motyl delights, which is fabulous. We exchange quite a few emails so the toppers matched my cake & she was extremely accommodating & oh so helpful. I made a Chocolate Buttercream Icing to finish some Easy Vanilla Cupcakes & simply topped them with the Owl design. Delightful! It was just the finishing touch that I needed to complete the cupcakes.


:: owl chocolate cake pops ::
:: owls lined up in a flock ::

I also sourced the Owl Cake Pops. Now, I did research this new trend but decided at the last minute that I was too time poor to create these beautiful & delicious delights myself. A local Hunter duo, The Iced Queens, have established themselves making & baking for markets in the Newcastle & Hunter Region with their amazing creations of perfection. I informed them of my colour theme & they were able to create an Owl Pop customised to my desire. I supplied them with Owl tags that I had individually stamped to add a great touch. You can now find them frequenting the Newcastle Farmers Markets with Pops & cupcakes, hurry, I hear they are a sell out!


:: owl "bird seed" with wafter crackers & tied with owl tags ::

I also wanted a healthier option for the health conscious mummies & bubs out there. I put together cello bags tied with Owl Tags of “Bird Seed” which consisted of sultanas, sunflower seeds & pumpkin seeds which my little boy loves. I also placed a bowl of apples on the table, another favourite, but his sweet tooth worked overtime that day & apples didn’t get a look in!


:: customised paper buntings ::

I made my own Paper Buntings from matching wrapping paper & themed colours. Just make sure the paper you choose has a high gsm otherwise it becomes too flimsy in the wind. I personalised them by printing & cutting out a “Will's 2nd Birthday” message to scroll across the bunting, with matching owls of course!


:: owl artwork at its best ::
:: owl masks... hoot hoot ::

I wanted some Owl themed party hats, but came up with Owl Masks instead. I found a printable version of an Owl Mask online, printed them onto card & cut them out, spray fixed the ink, attached elastic & one magic Owl Mask! Now, multiply that by 17. The result was beautiful. We had one little “Owl” who didn’t take her mask off, just adorable!


:: asian lanters add colour & style ::

I found some light blue & red Asian lanterns to hang from our awning in a local discount shop, a great find for any party. I love the “lace” effect these lanterns have as they allow light flicker through them during the day, a soft & colourful touch. These are a great & cost effective way to add colour to any back yard gathering. Simply swap out the colours for your themed event.


:: home photo with daddy's thumb ::
:: photo board- day 0-2yrs ::

I also created a photo board. The board is simply an A2 piece of card covered with quality wrapping paper from Kikki.K. I got some kitchen twine & wrapped it around, affixed from the top & bottom, then went through a collection of photos I had taken from when Will was a baby until now. I then set about hanging them up with an additional Owl touch, cutting out some Hootable creatures along the way. The “baby pegs” can be found in any craft store.


:: sweet table with some classic treats ::

:: take home thank you bags ::

The Sweet Table with Thank You Bags were also a hit. Fill it up with M&M’s, Freckles, Marshmallows, Cupcakes, Cake, Cookies, Honey Joys... whatever takes your fancy! I also had bubbles, which seem to be a favourite of toddlers, for all the kids to take home. I attached Owl tags to the bubbles to tie them in with the theme.


:: classic chocolate crackles made by my neighbour- always a hit ::
:: a quick snap of the table before all the food went ::

Food for the late afternoon event was fun. I had additional chocolate crackles, honey joys, sausage rolls, a cut baguette, all the party classics! For later in the evening we had chicken skewers & a Hunter Valley cheese platter to finish the day.


:: owl figures- a special touch ::
:: chocolate crackles gone in an instant ::

I am glad that there were some pictures of the day. As you can imagine I was extremely busy in the kitchen & surrounds that I didn't have time to do my usual happy snaps, so thank you to those who picked up my camera! I had such a great time creating this memory for my little man, I can only hope that he grows up to love birthdays just as much as I do.


:: a very happy boy blowing out his candles ::


Sunday 10 July 2011

:: Apple & Rhubarb Pie Recipe ::

Wholesome Apple & Rhubarb Pie
:: Megann’s Kitchen ::

:: apple & rhubarb pie in megann's kitchen ::
 
Growing up in the Alpine Shire of Victoria, we would frequent the snow staying in a close knit community run Lodge which my father had been visiting since he was 18 years old. Each time we stayed he would point out he helped build that bed, or put in those steps. My sister even helped make the doona covers that stayed on for decades. Sometimes it was the whole family staying there with our close friends, sometimes it was simply my father & I doing a quick weekend visit to catch the latest snowfall & in the latter years, it was just me. Either way, the entire lodge was filled with warmth, laughter & flowing wine (& schnapps) for the parents as there was always someone there that you knew. I grew up with the lodge & the people in it, so I feel very attached to it. There was one other constant in the lodge... Apple Pies.
Now, I have to admit these desserts were usually from the box from the conveniently located supermarket next door by “Sara Lee” or “Nanna’s”, but after a hard days skiing in the freezing cold there isn’t anything better to top off a meal than baked fruit & shortcrust pastry.
Nowadays each Autumn, when the apples come back into season & there is a slight chill in the air, I have a craving for Apple Pies of different varieties (+rhubarb or +blueberries) & winter spices, so I roll up my sleeves & think of snow & good times of yesteryear.

1 quantity sweet shortcut pastry (see recipe link)
8 large granny smith apples, peeled, cored & cut into wedges

1 tbsp water
1 cup rhubarb, sliced on the diagonal
¼ cup sugar
¼ cup brown sugar
1 tbsp lemon juice
1 tsp ground cinnamon
¼ tsp ground nutmeg
¼ tsp ground allspice
3 tbsp almond meal
1 egg, lightly beaten
sugar for sprinkling (optional)

Preheat the oven to 190°C (375°F). To make the filling, place the apples & water in a deep frying pan over medium heat. Cover and simmer, gently stirring the contents of the pan occasionally, for 5 minutes or until just tender. Cool completely. Stir in both sugars, lemon juice, cinnamon, nutmeng & allspice. Gently stir through the sliced rhubarb to finish the filling mixture.
Divide the pastry into two-thirds and one-third. Roll out the two-thirds portion onto a lightly floured surface of cling wrap until 3mm thick. Lift & place in a shallow 24cm (9 1/2 in) pie tin & peel off the cling wrap. Sprinkle over the almond meal and pack the apple & rhubarb mixture tightly into the pastry shell, lifting from the pan with a slotted spoon as to not gather up excess moisture.
Roll out the remaining pastry, also onto cling wrap, to fit over the top of the pie. Once in place, peel off the cling wrap. Brush the rim with water, press the edges together & trim. Finish the pastry edges by pressing the back side of a fork at even intervals. Cut several slits in the top of the pastry, brush with the egg. If you like the crunchy sugar texture on a pie, this is where you would sprinkle on your caster sugar, however we seem to like the plain buttery flakiness of the pastry. Bake for 35 minutes or until the pastry is golden and crisp.


:: apple, rhubarb & spice mixture ::

Serve: Rest your pie for about 15 minutes & serve fresh out of the oven with a generous helping of double cream or vanilla ice-cream.

Kitchen Notes: Taste your apple mixture before you add it to the pastry to see if any flavour adjustments are needed.

Pie Options:
:: Substitute 1 cup of Blueberries for the Rhubarb for "Apple and Blueberry Pie". It is super moist & juicy.
:: Substitute 1 extra Apple for the Rhubarb for "Wholesome Apple Pie", a classic favourite loved by all.


:: filling the pastry shell ::


:: pressing the edges with a fork ::

:: pie, ready to serve ::


Source: Discover DonnaHay Modern Classics Book 2 at a discount price, delivered free (RRP AU $39.95)


Related Posts Plugin for WordPress, Blogger...